

Uploading CSV
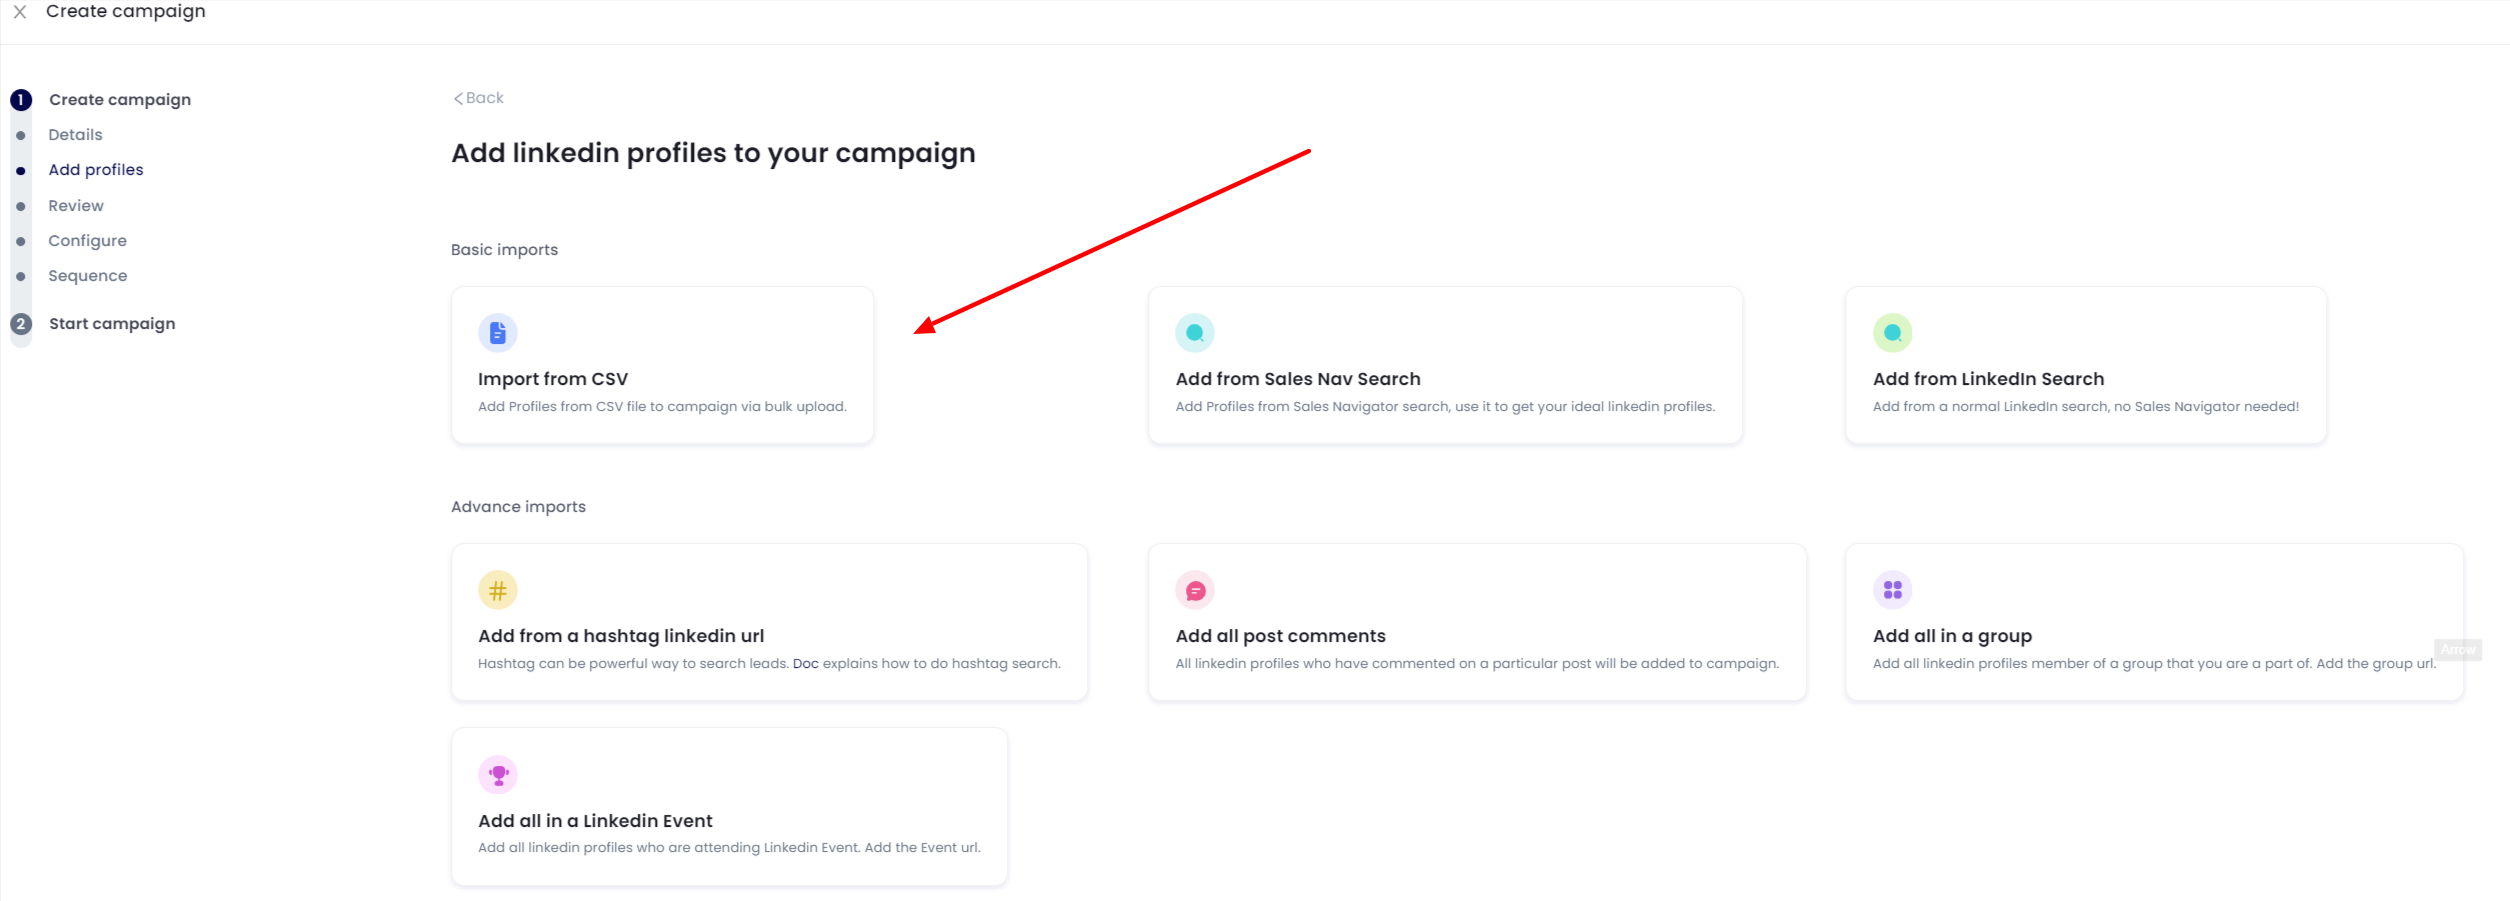
- Navigate to Campaigns and click "Create Campaign" on the top right
- Name your Campaign - use something descriptive that will allow you to remember the targets in the list
- Click Import from CSV
There is a sample CSV format you can download to see the required columns:
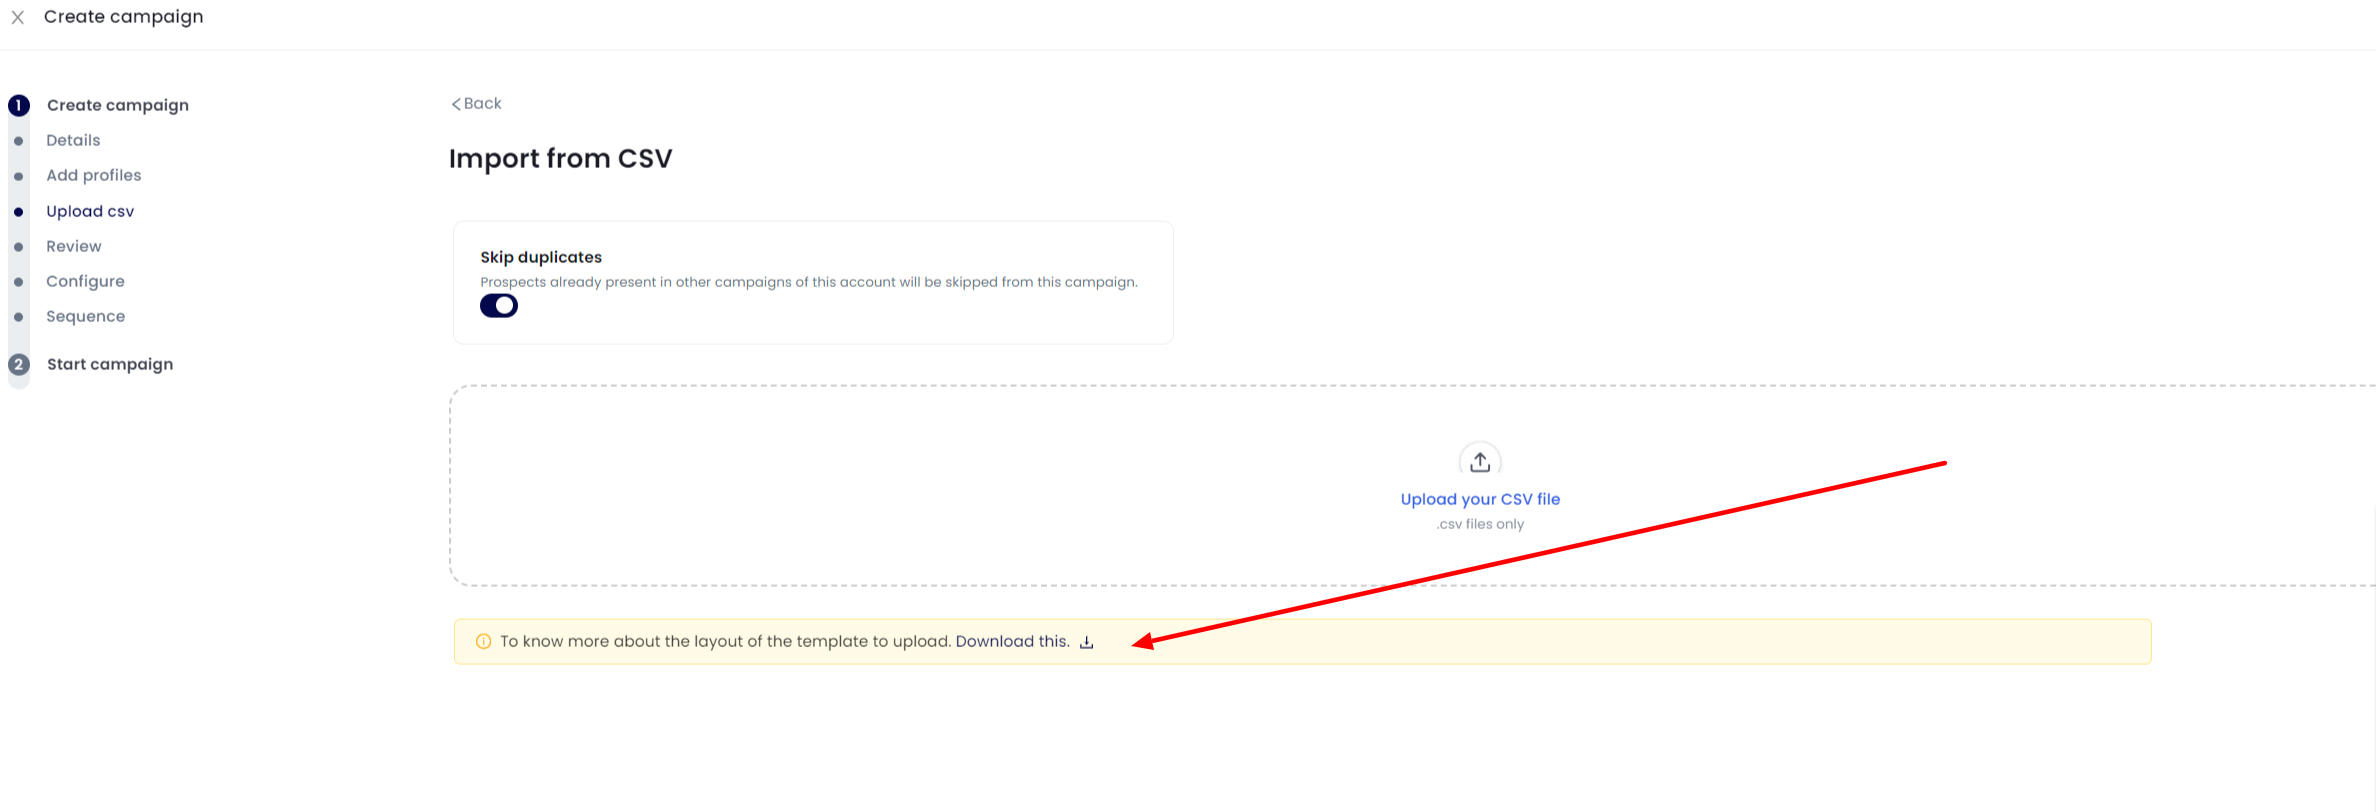
Choose whether you would like to keep "Skip duplicates" on or off. If it is on, then any person in your CSV will be checked against all other campaigns; if there is a duplicate, they will not be contacted.
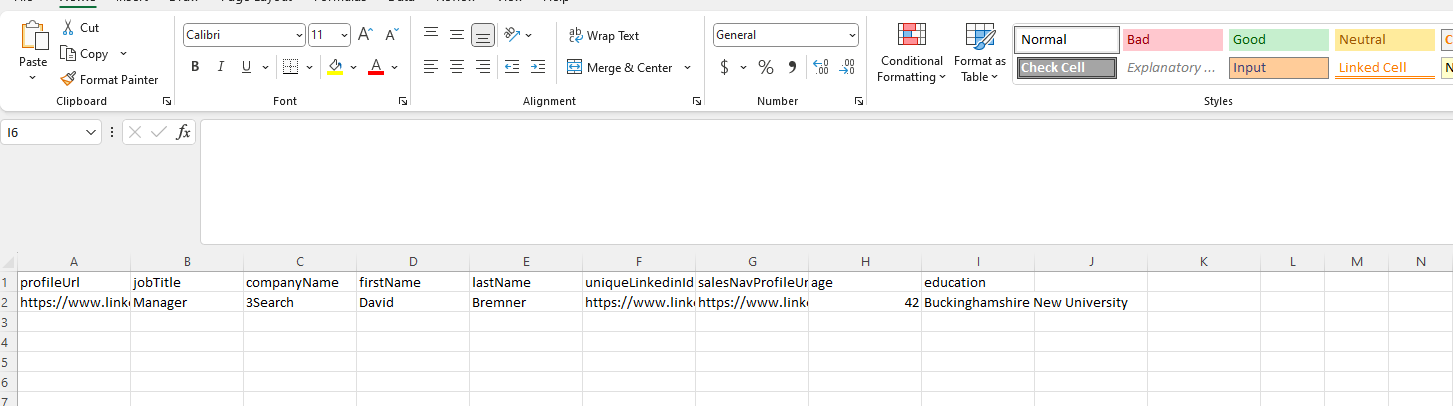
4. This is what the sample CSV looks like. Note that you can name your columns whatever you like and the AI will attempt to map the fields in the next screen.
Very Important:
Note that the LinkedIn profileURL is required even if you are creating Email Only sequences.
Note also that if your email or LinkedIn sequence contains merge tags such as jobTitle, FirstName, LastName, those fields CANNOT be left blank. Or that target will be SKIPPED.
For example, below we have a CSV template for Email Outreach
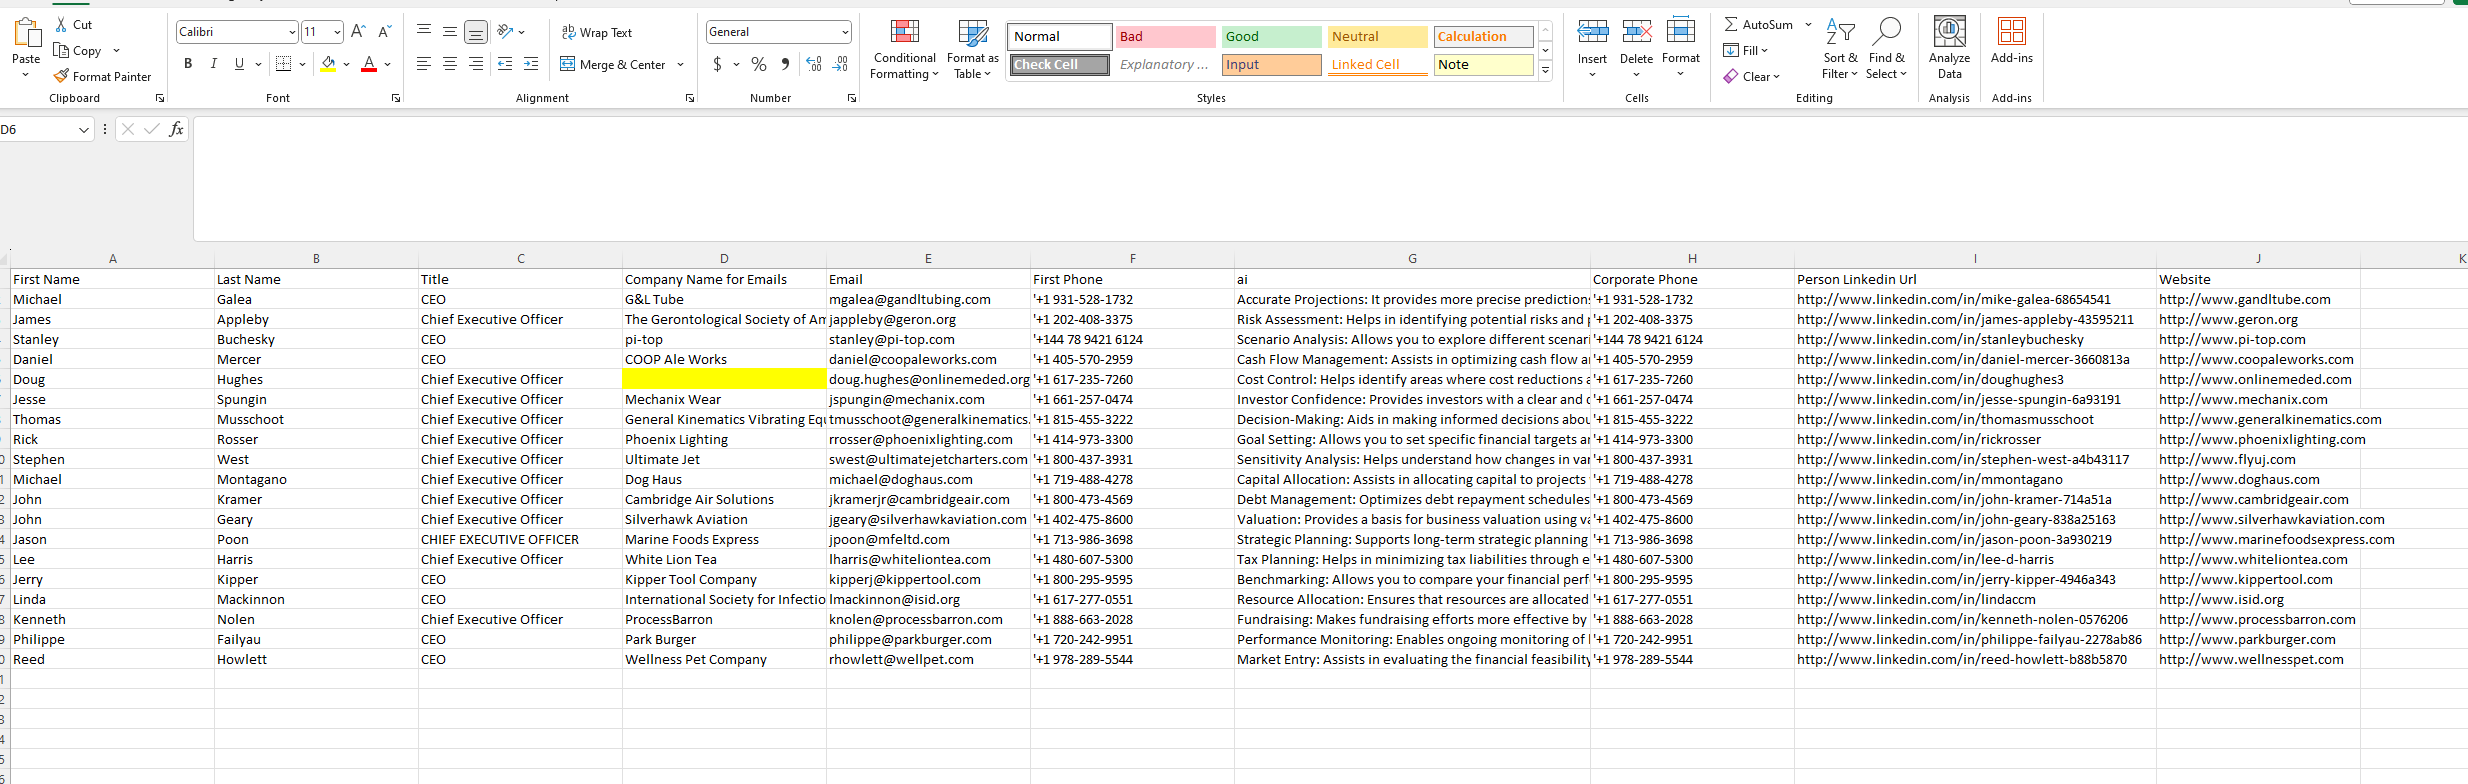
Note that we are missing (in Yellow) the name of the company for Doug Hughes. If, in your outreach email sequence we have the merge tag {{Company Name for Emails}}, Doug's outreach WILL BE SKIPPED.
Also note that we can add ANY column including an AI personalization one into our LinkedIn or Email sequences (See Column G, ai). All we need to do is Map that to a custom column (see below) and add brackets around the name of the column. In this case it would be {{ai}}.
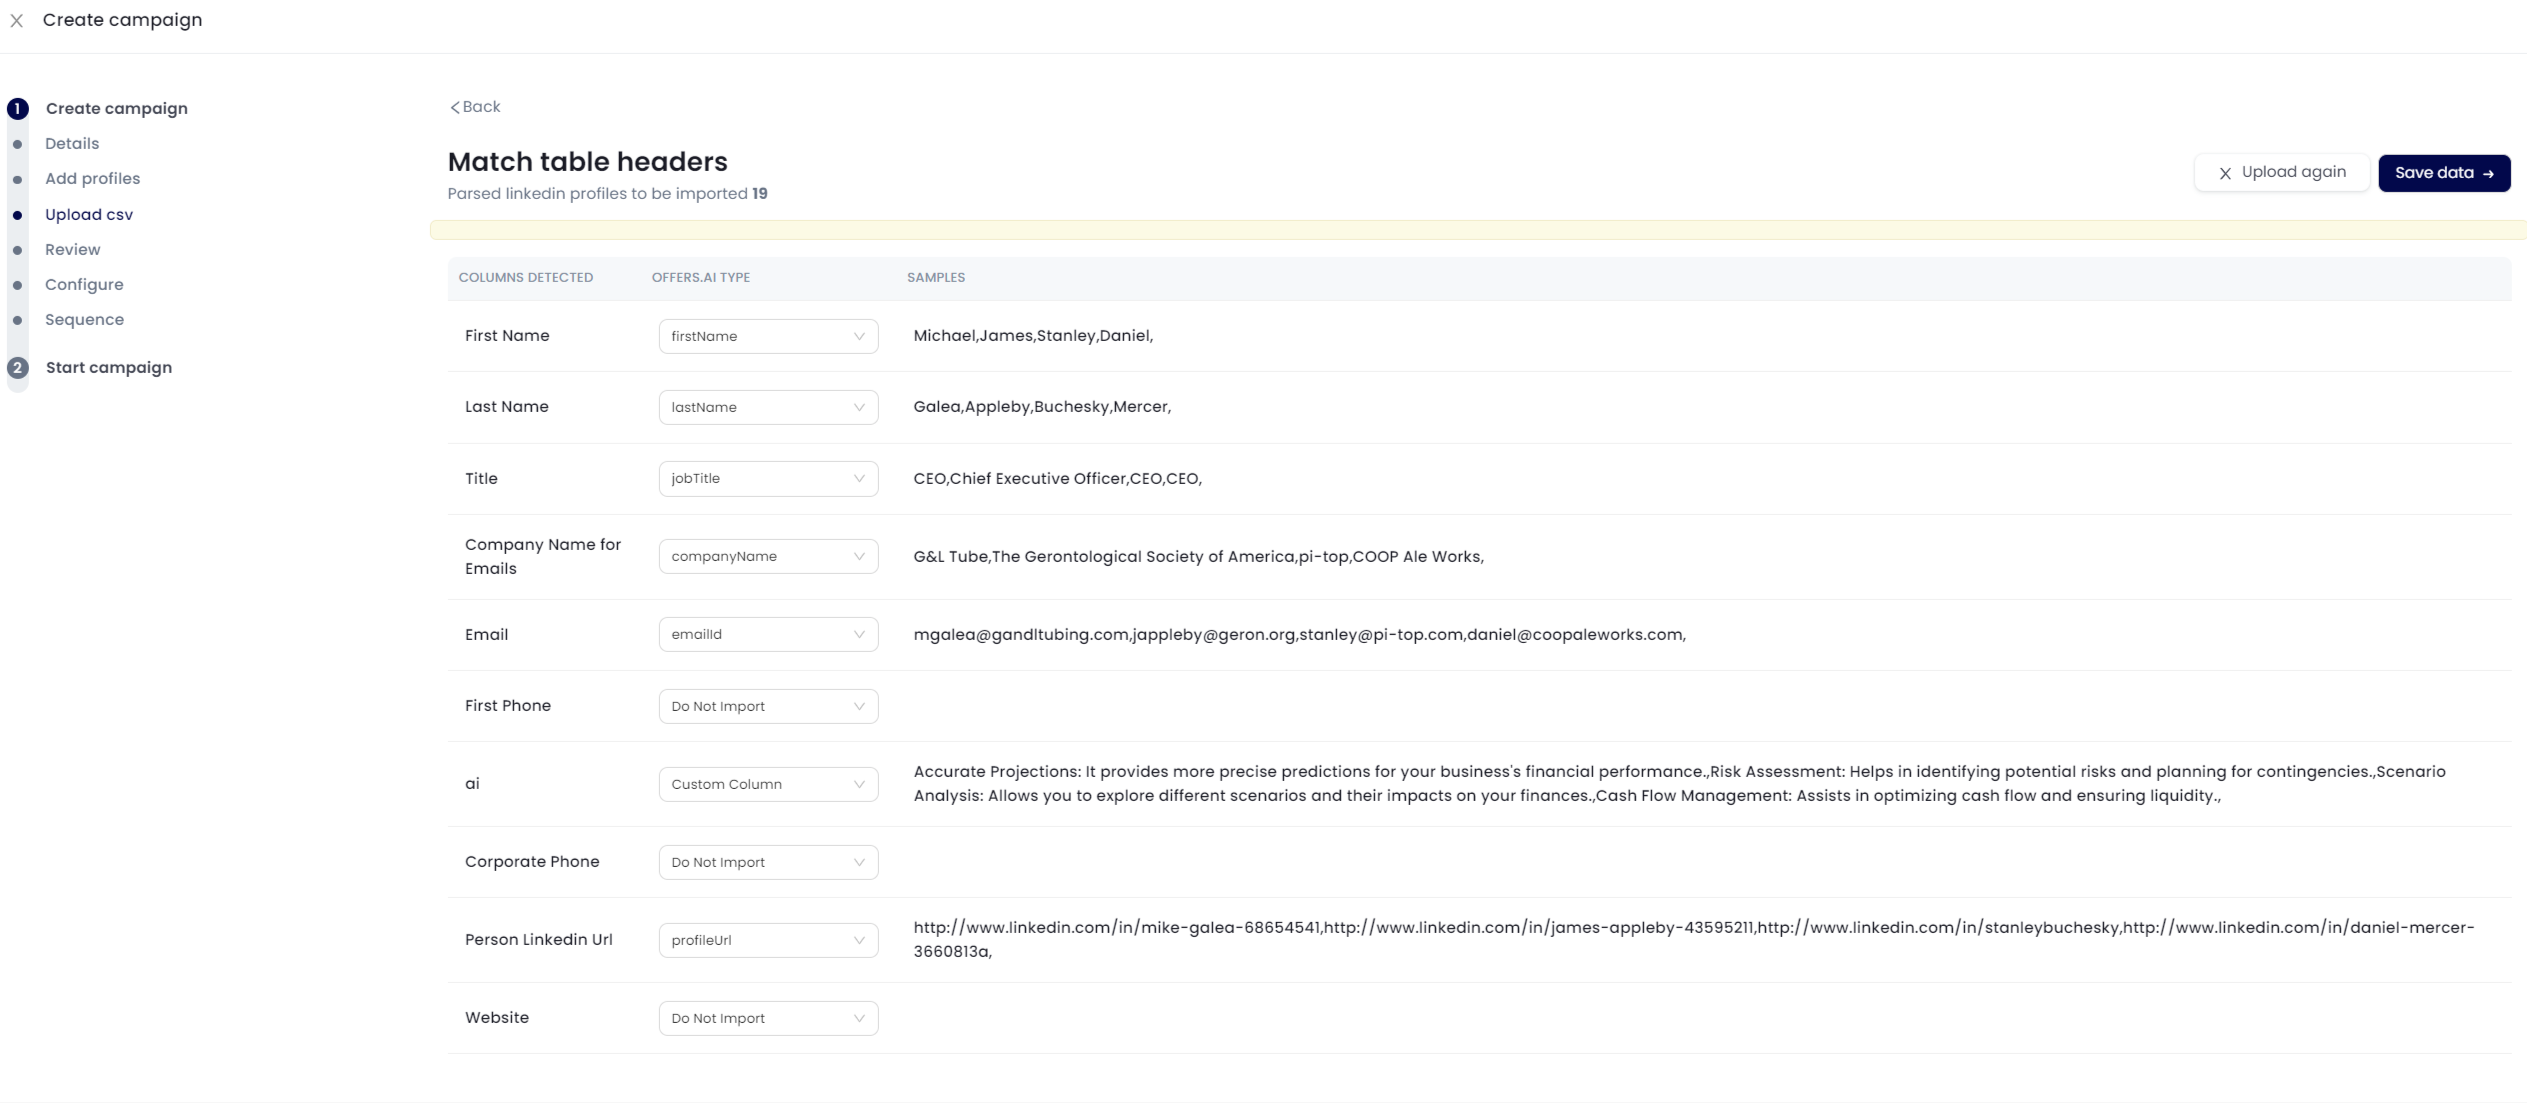
5. Next, map the columns. Note that you need to choose which columns to import. In this case we will map ai to Custom Column.
6. Click Save Data
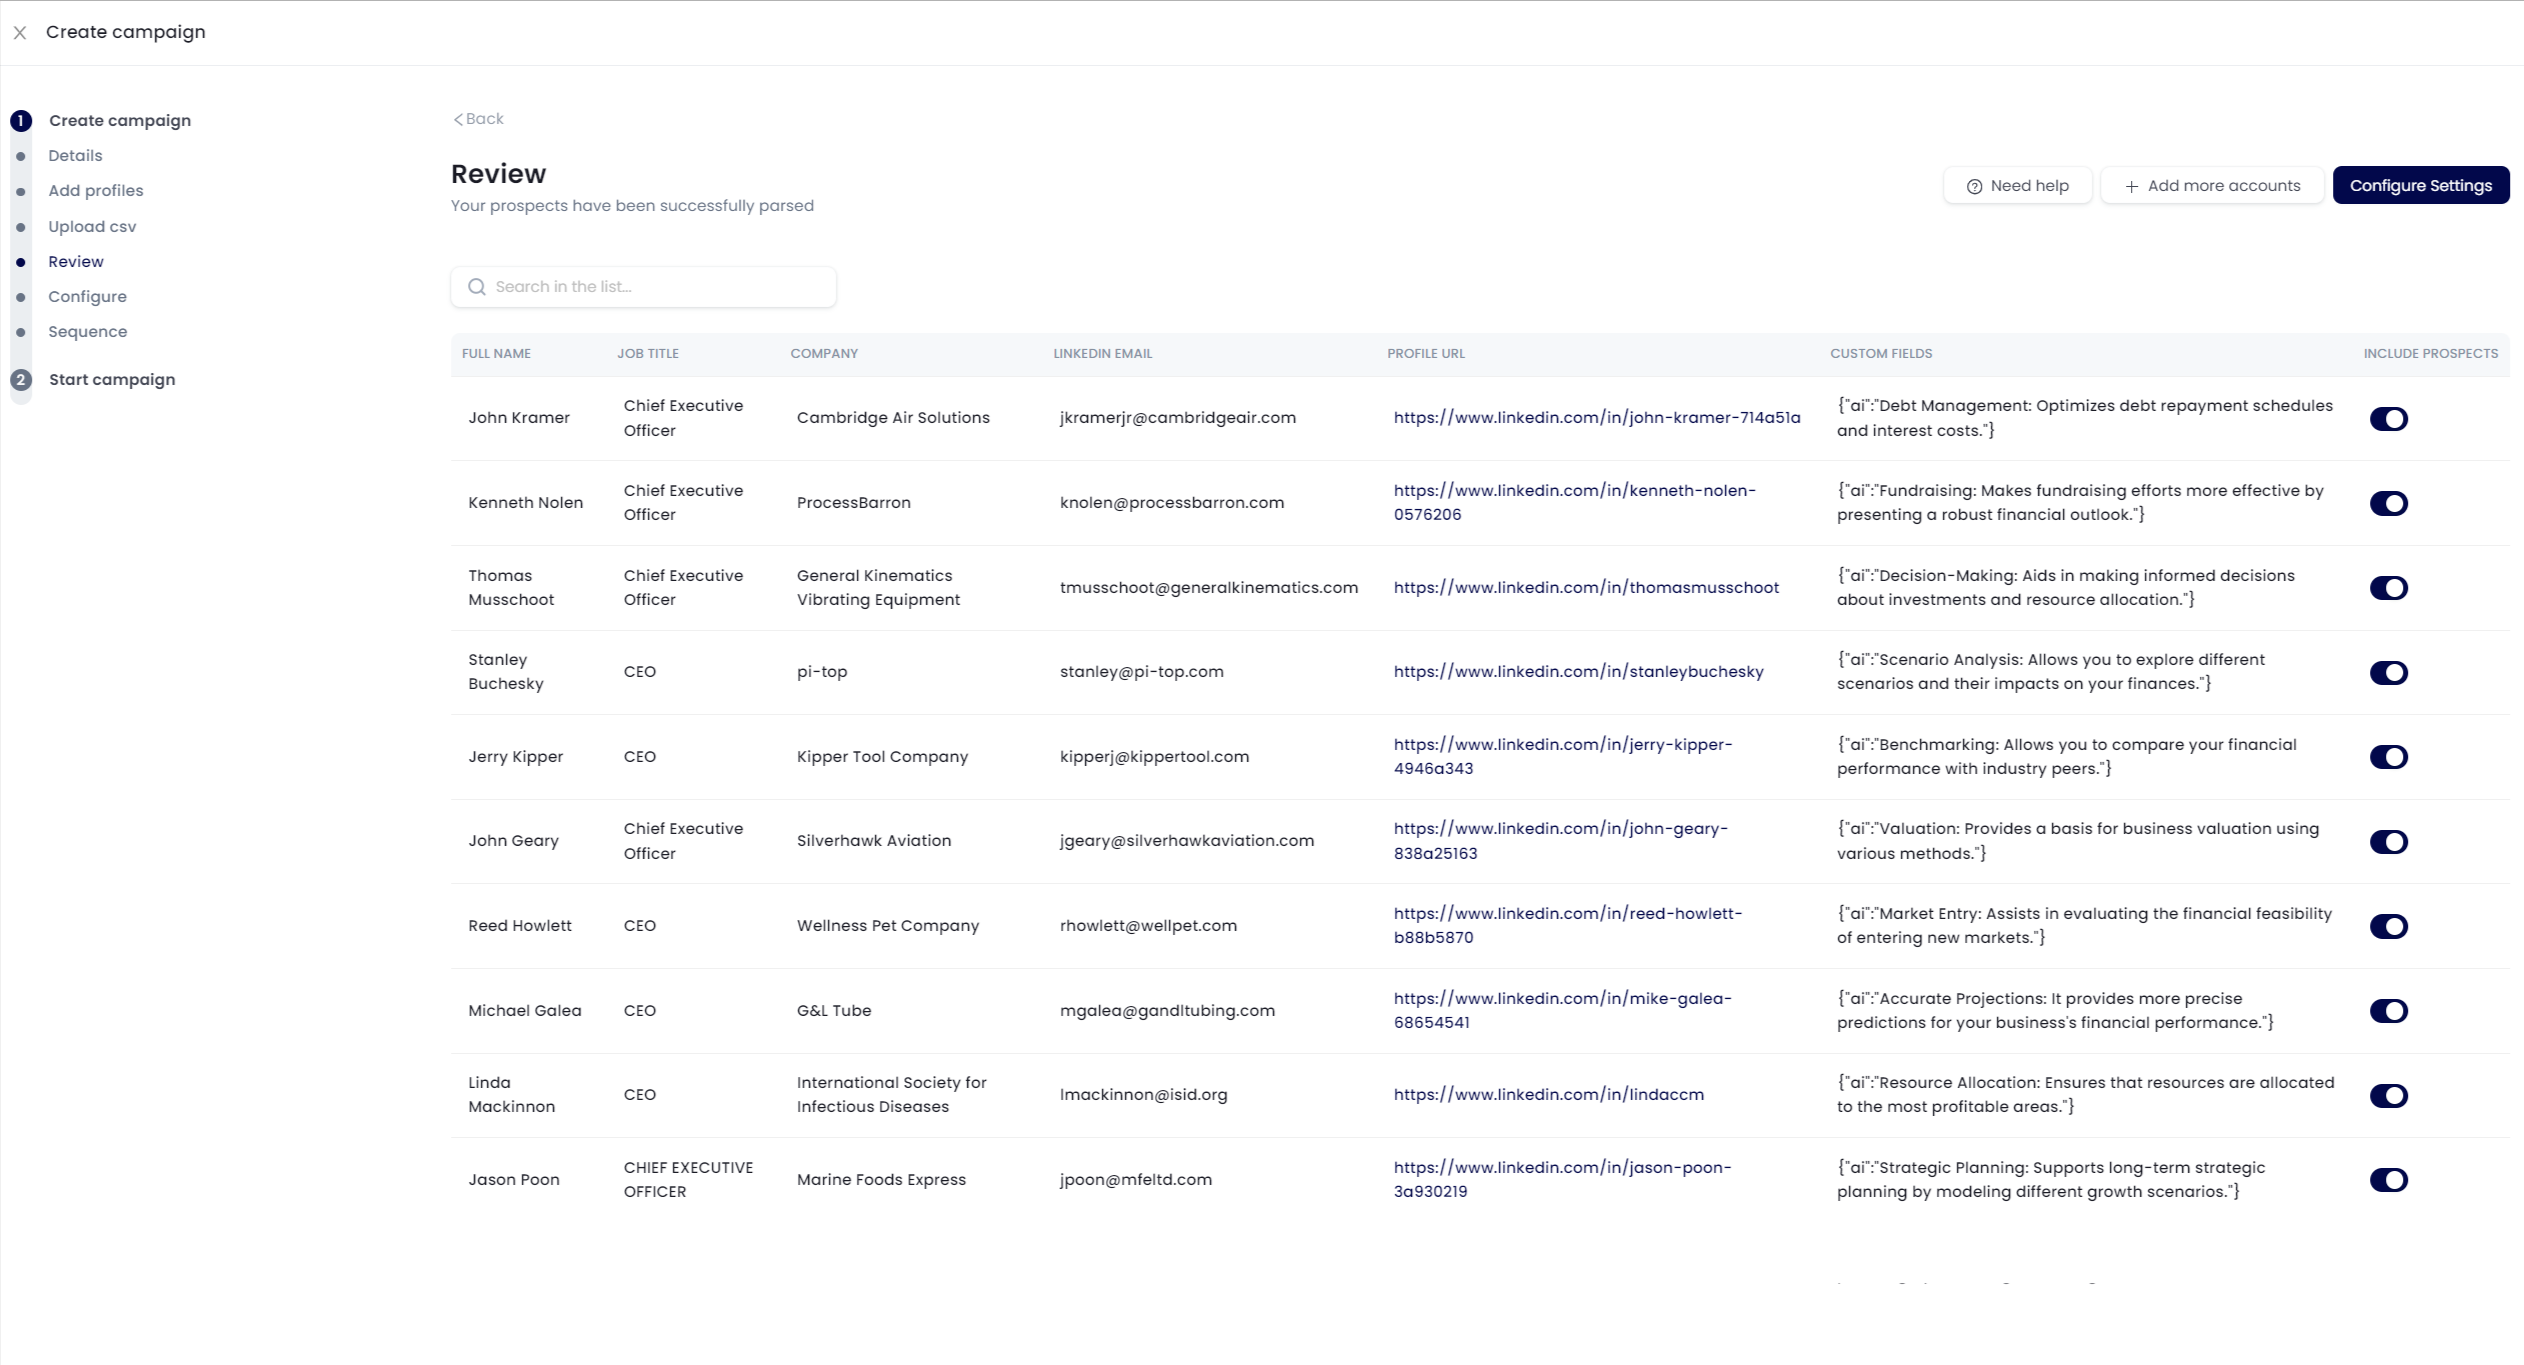
7. Review and click Configure Settings
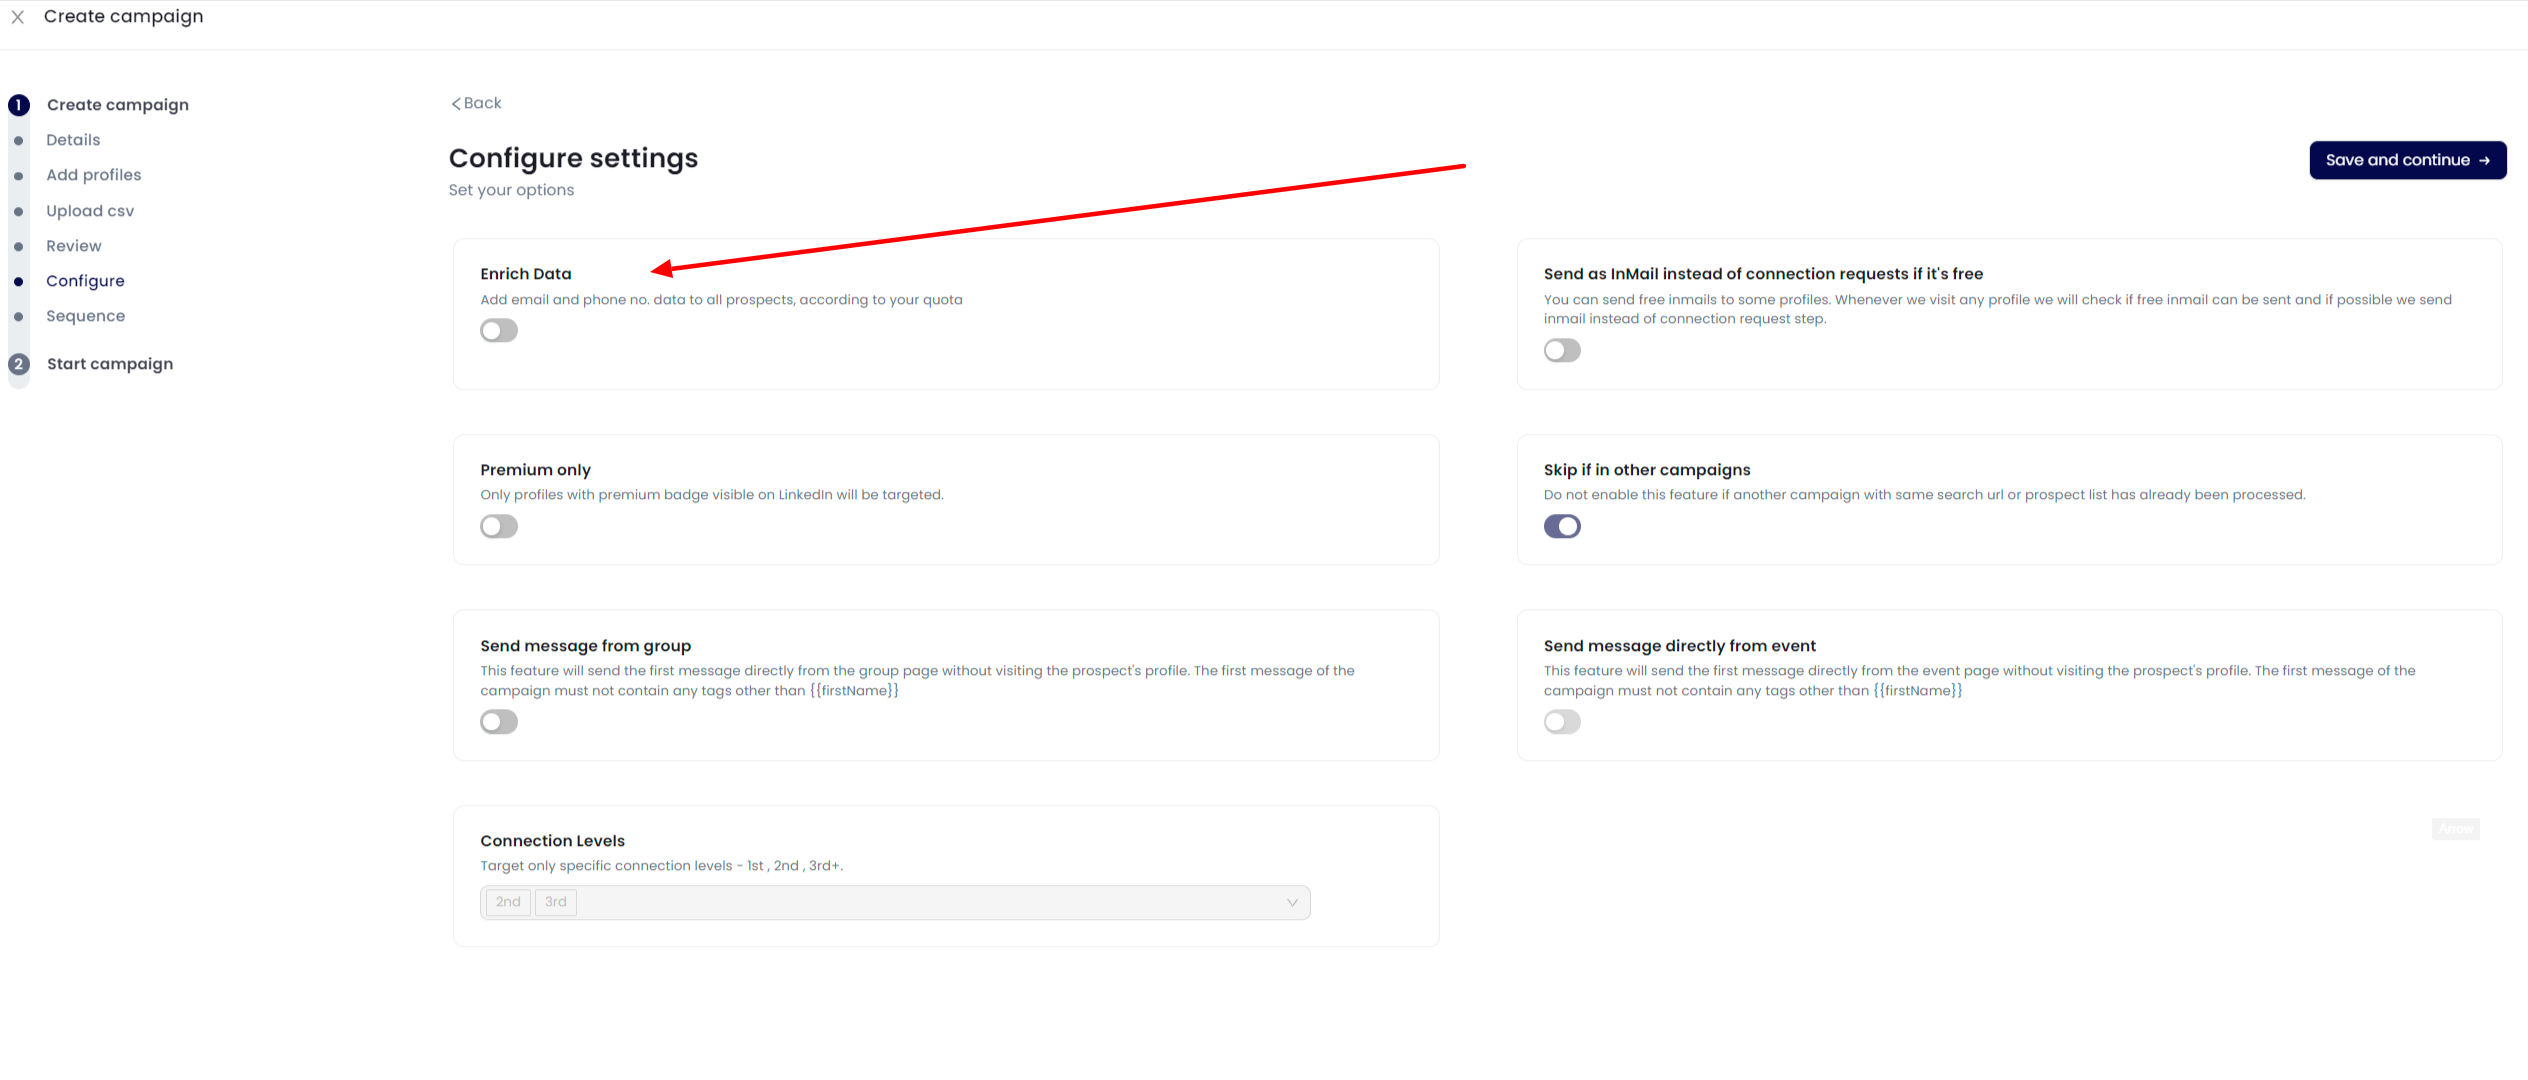
8. In this case since we ALREADY HAVE EMAILS (i.e. we imported the list from CSV) we DO NOT want to turn on Enrich Data. Turning this on will overwrite the emails you have imported and replace with our own built in Data Enrichment.
9. Click Save and continue
10. Choose a prebuilt Template or Create a new one
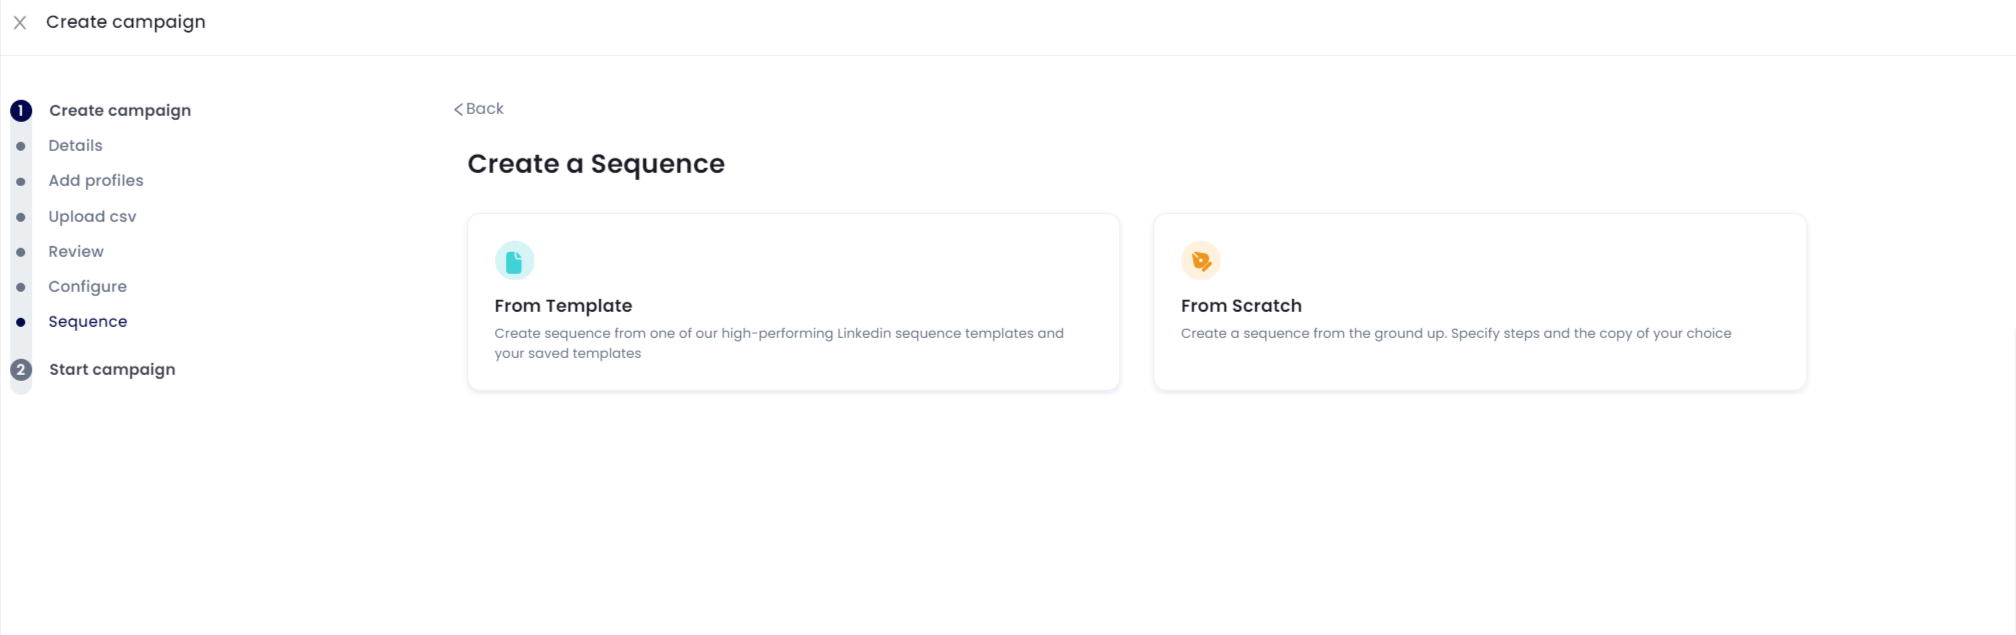
11. In this case we are sending Emails so click From Scratch and Click Send Email.
Note that you can mix and match LinkedIn and Email however you can only use Send Message if you are already connected with that person, OR after they connect with you.
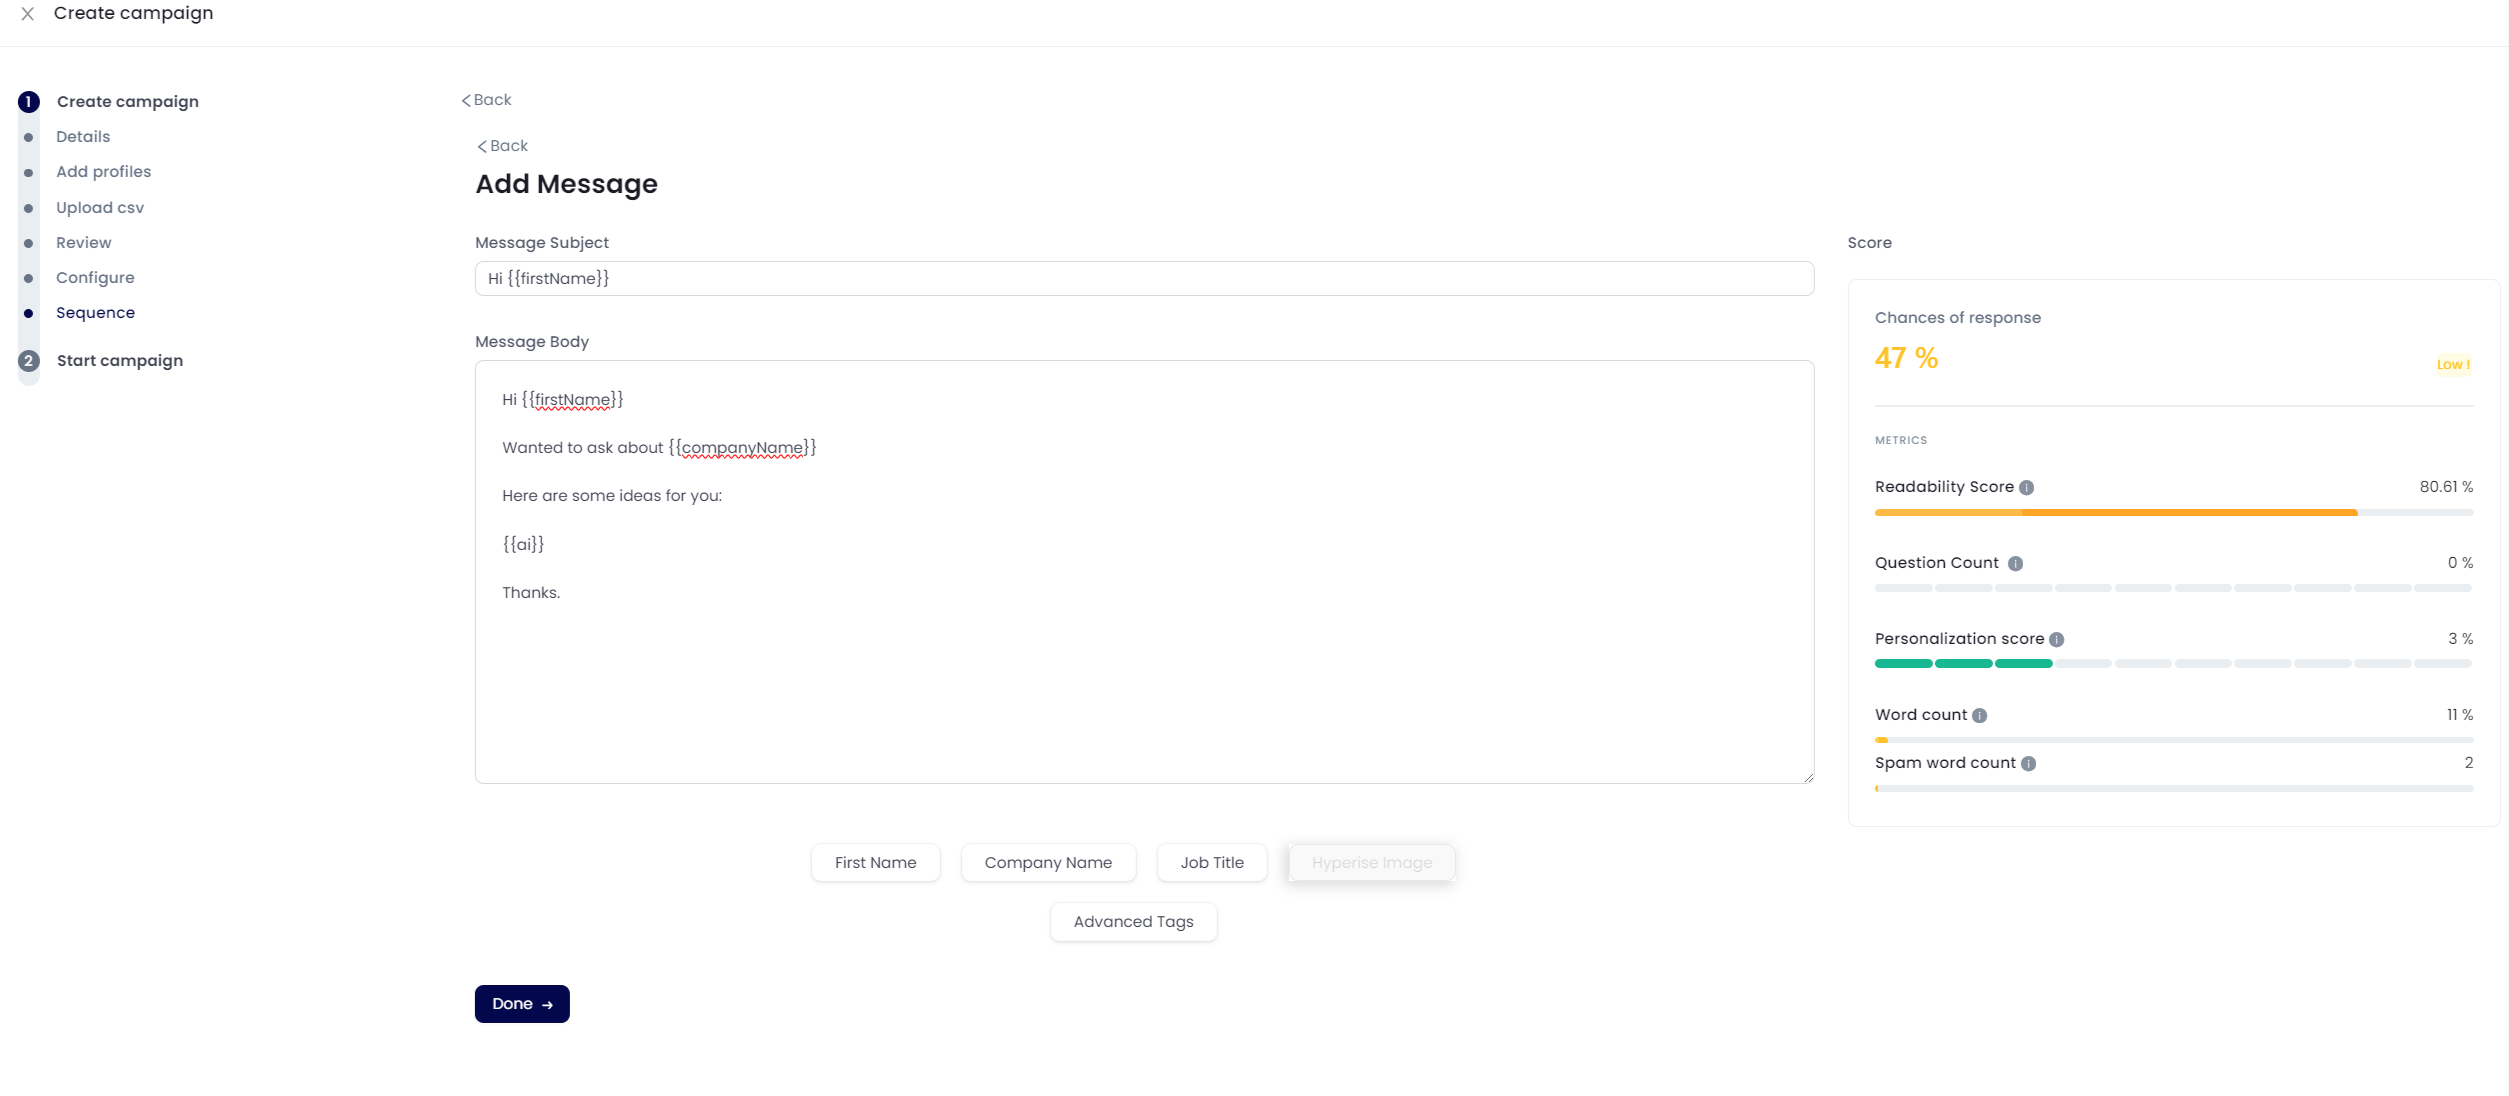
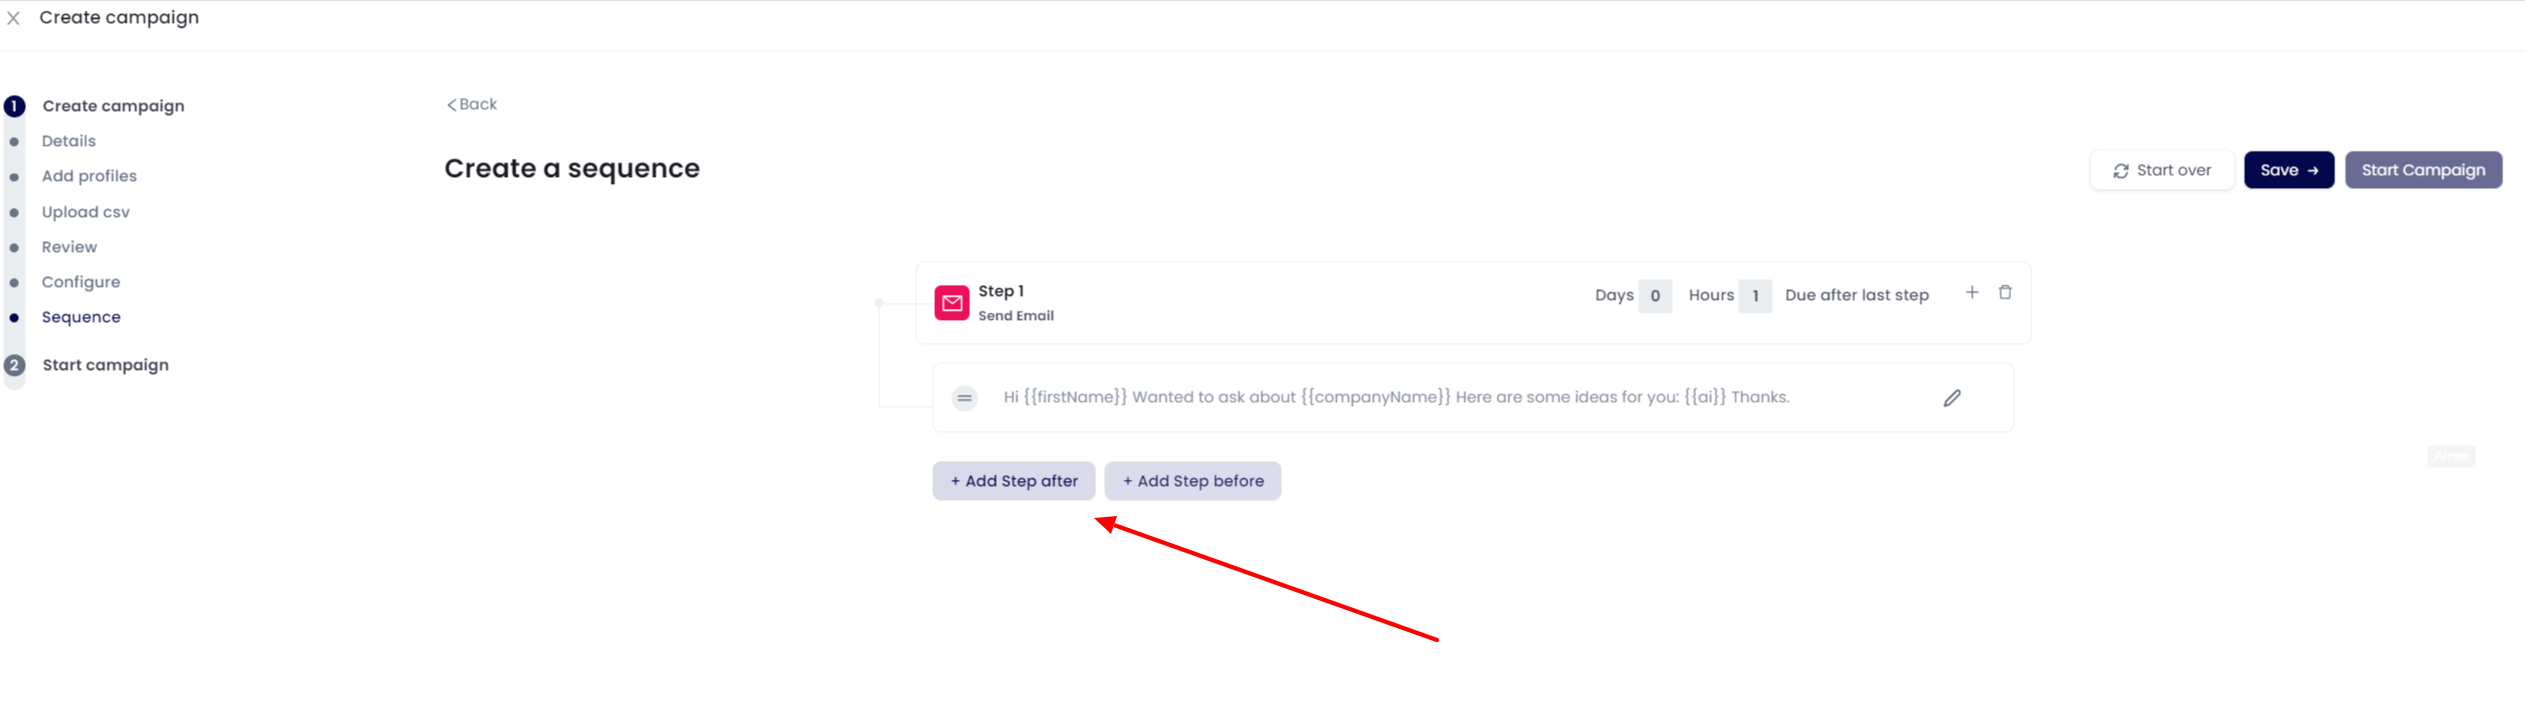
12. Create your message:
Note that you can use Merge tags in Subject and Body and that for CUSTOM FIELDS (SUCH AS 'AI') YOU NEED TO WRAP IT IN BRACKETS: {{ }}
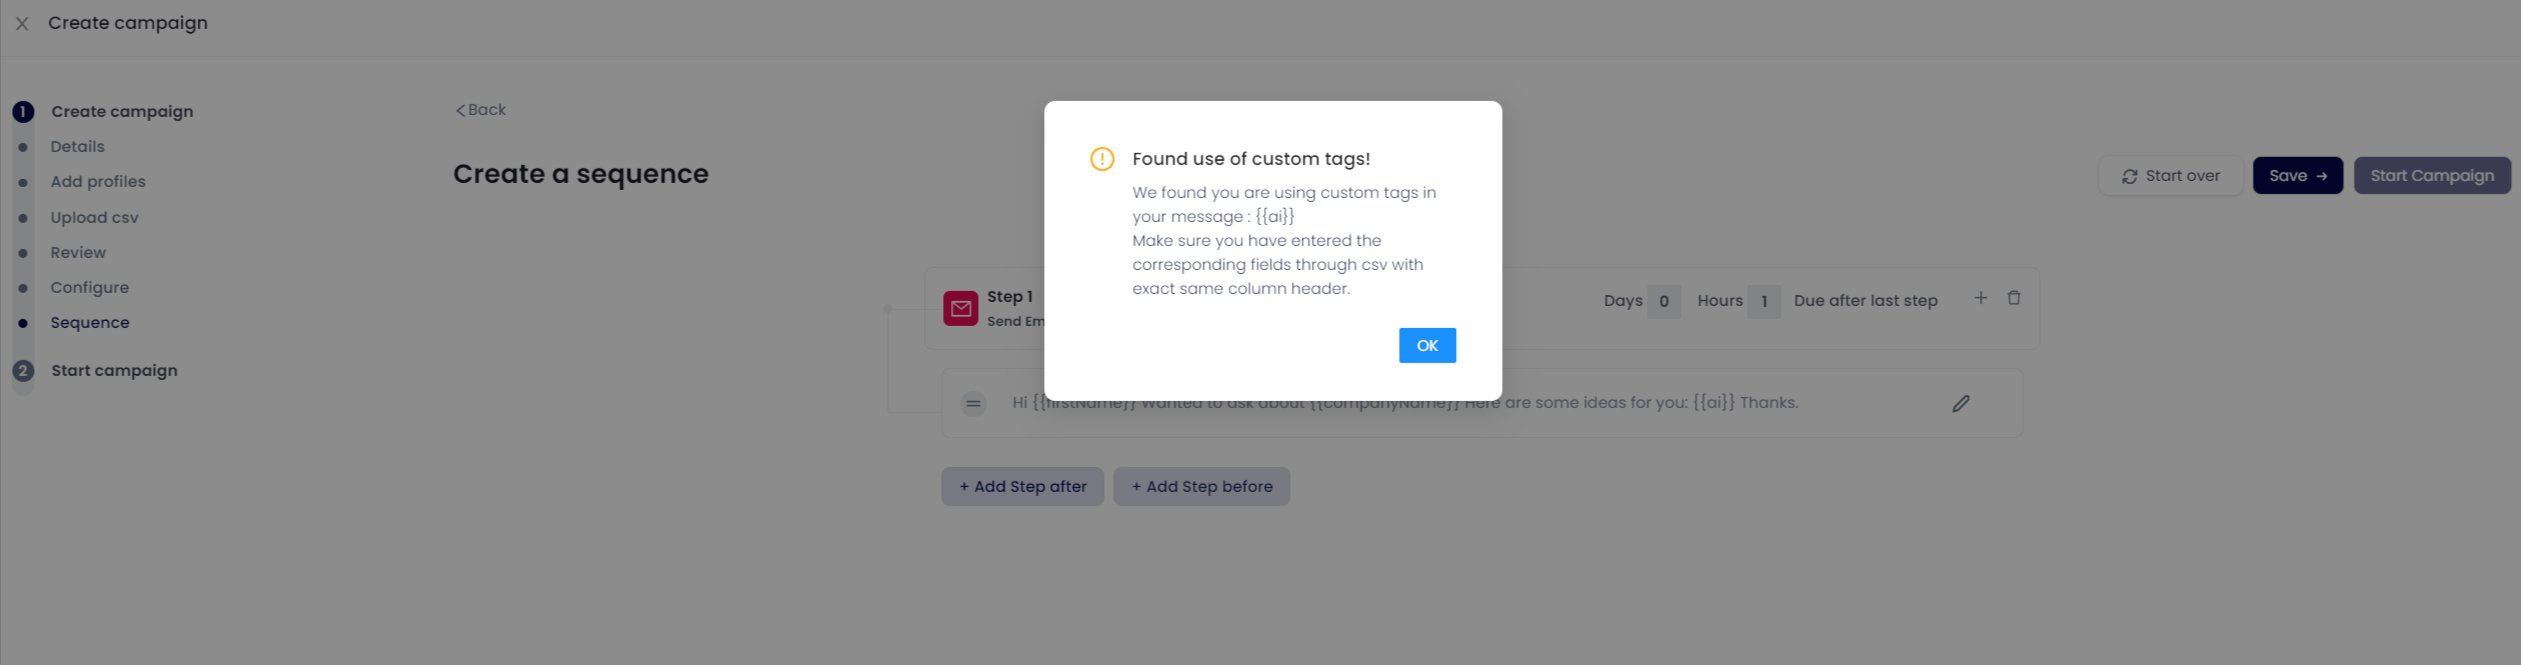
13. Click DONE. In our case since we DID use a CUSTOM FIELD merge tag {{ai}}, there will be a warning that we did this. Just make sure the Column Name in CSV matches what you put in the merge tag.
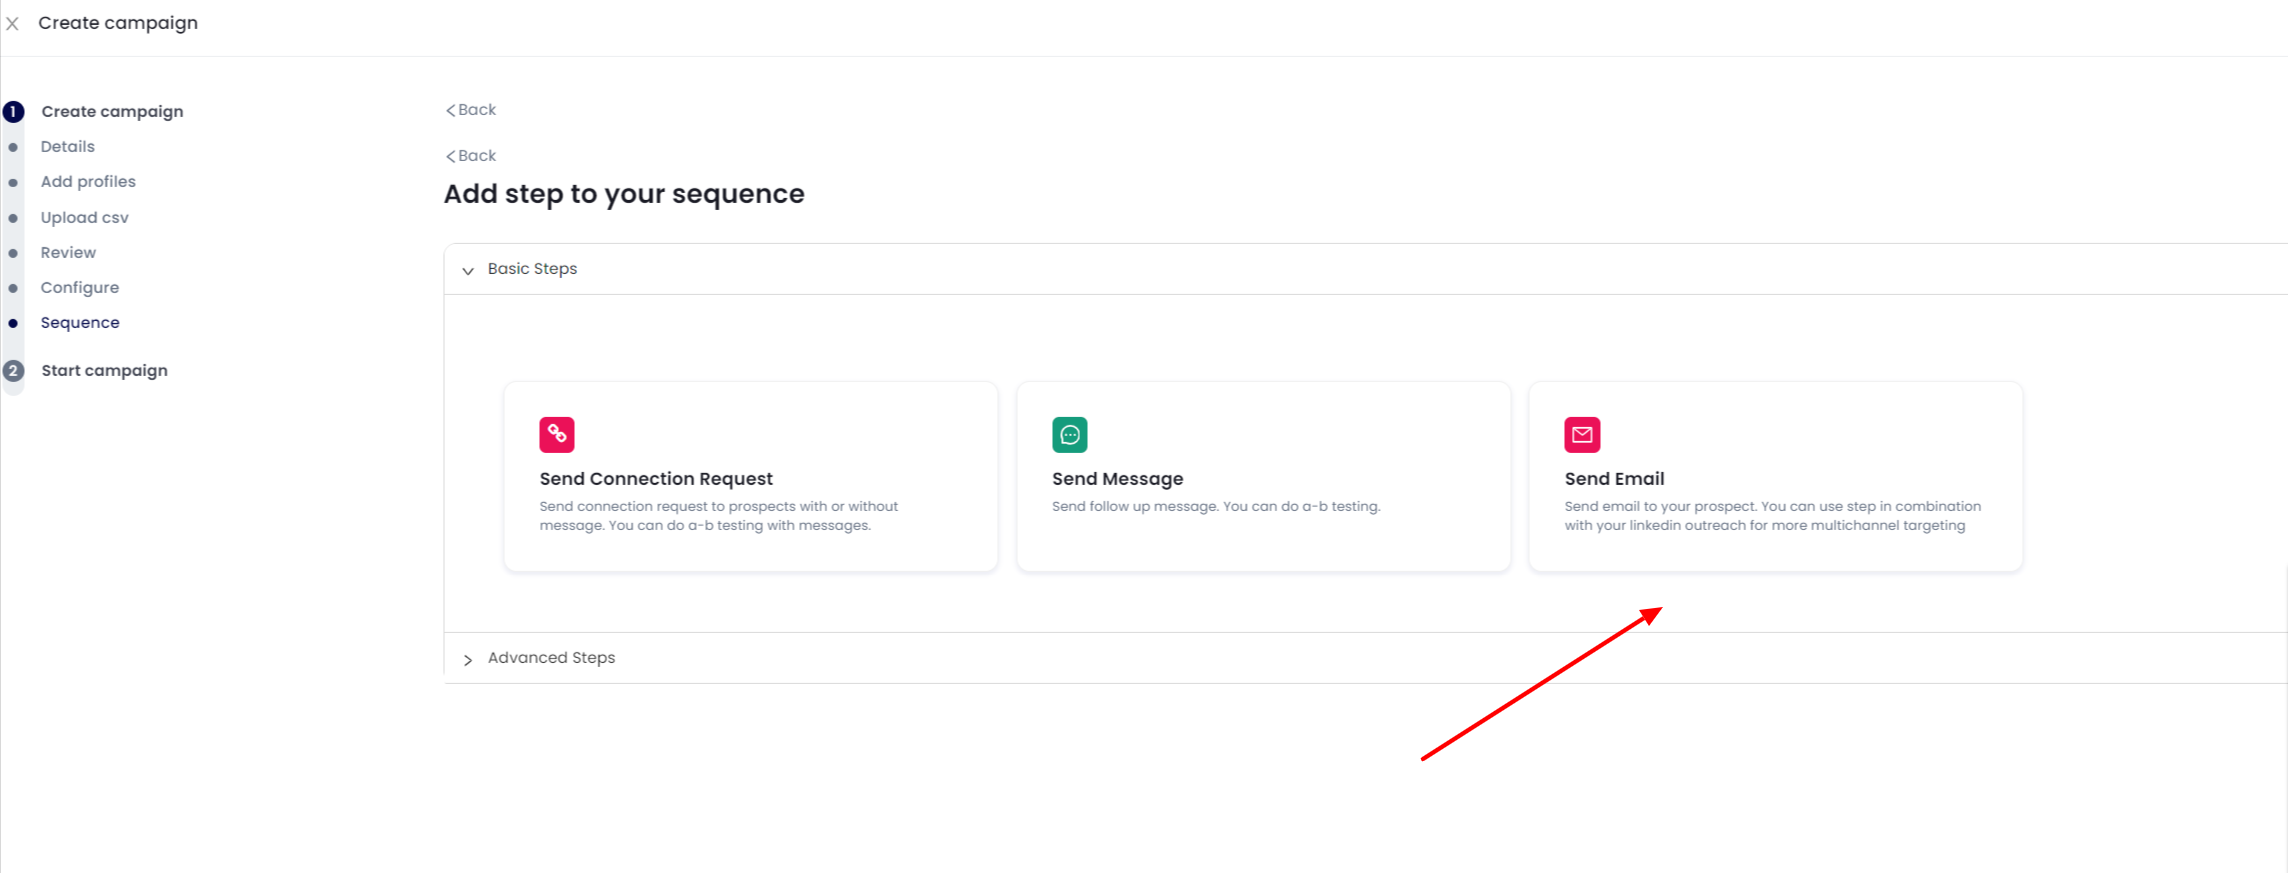
14. Click OK and Add Step After for Additional Steps (Emails, LinkedIn Connection Requests etc.)
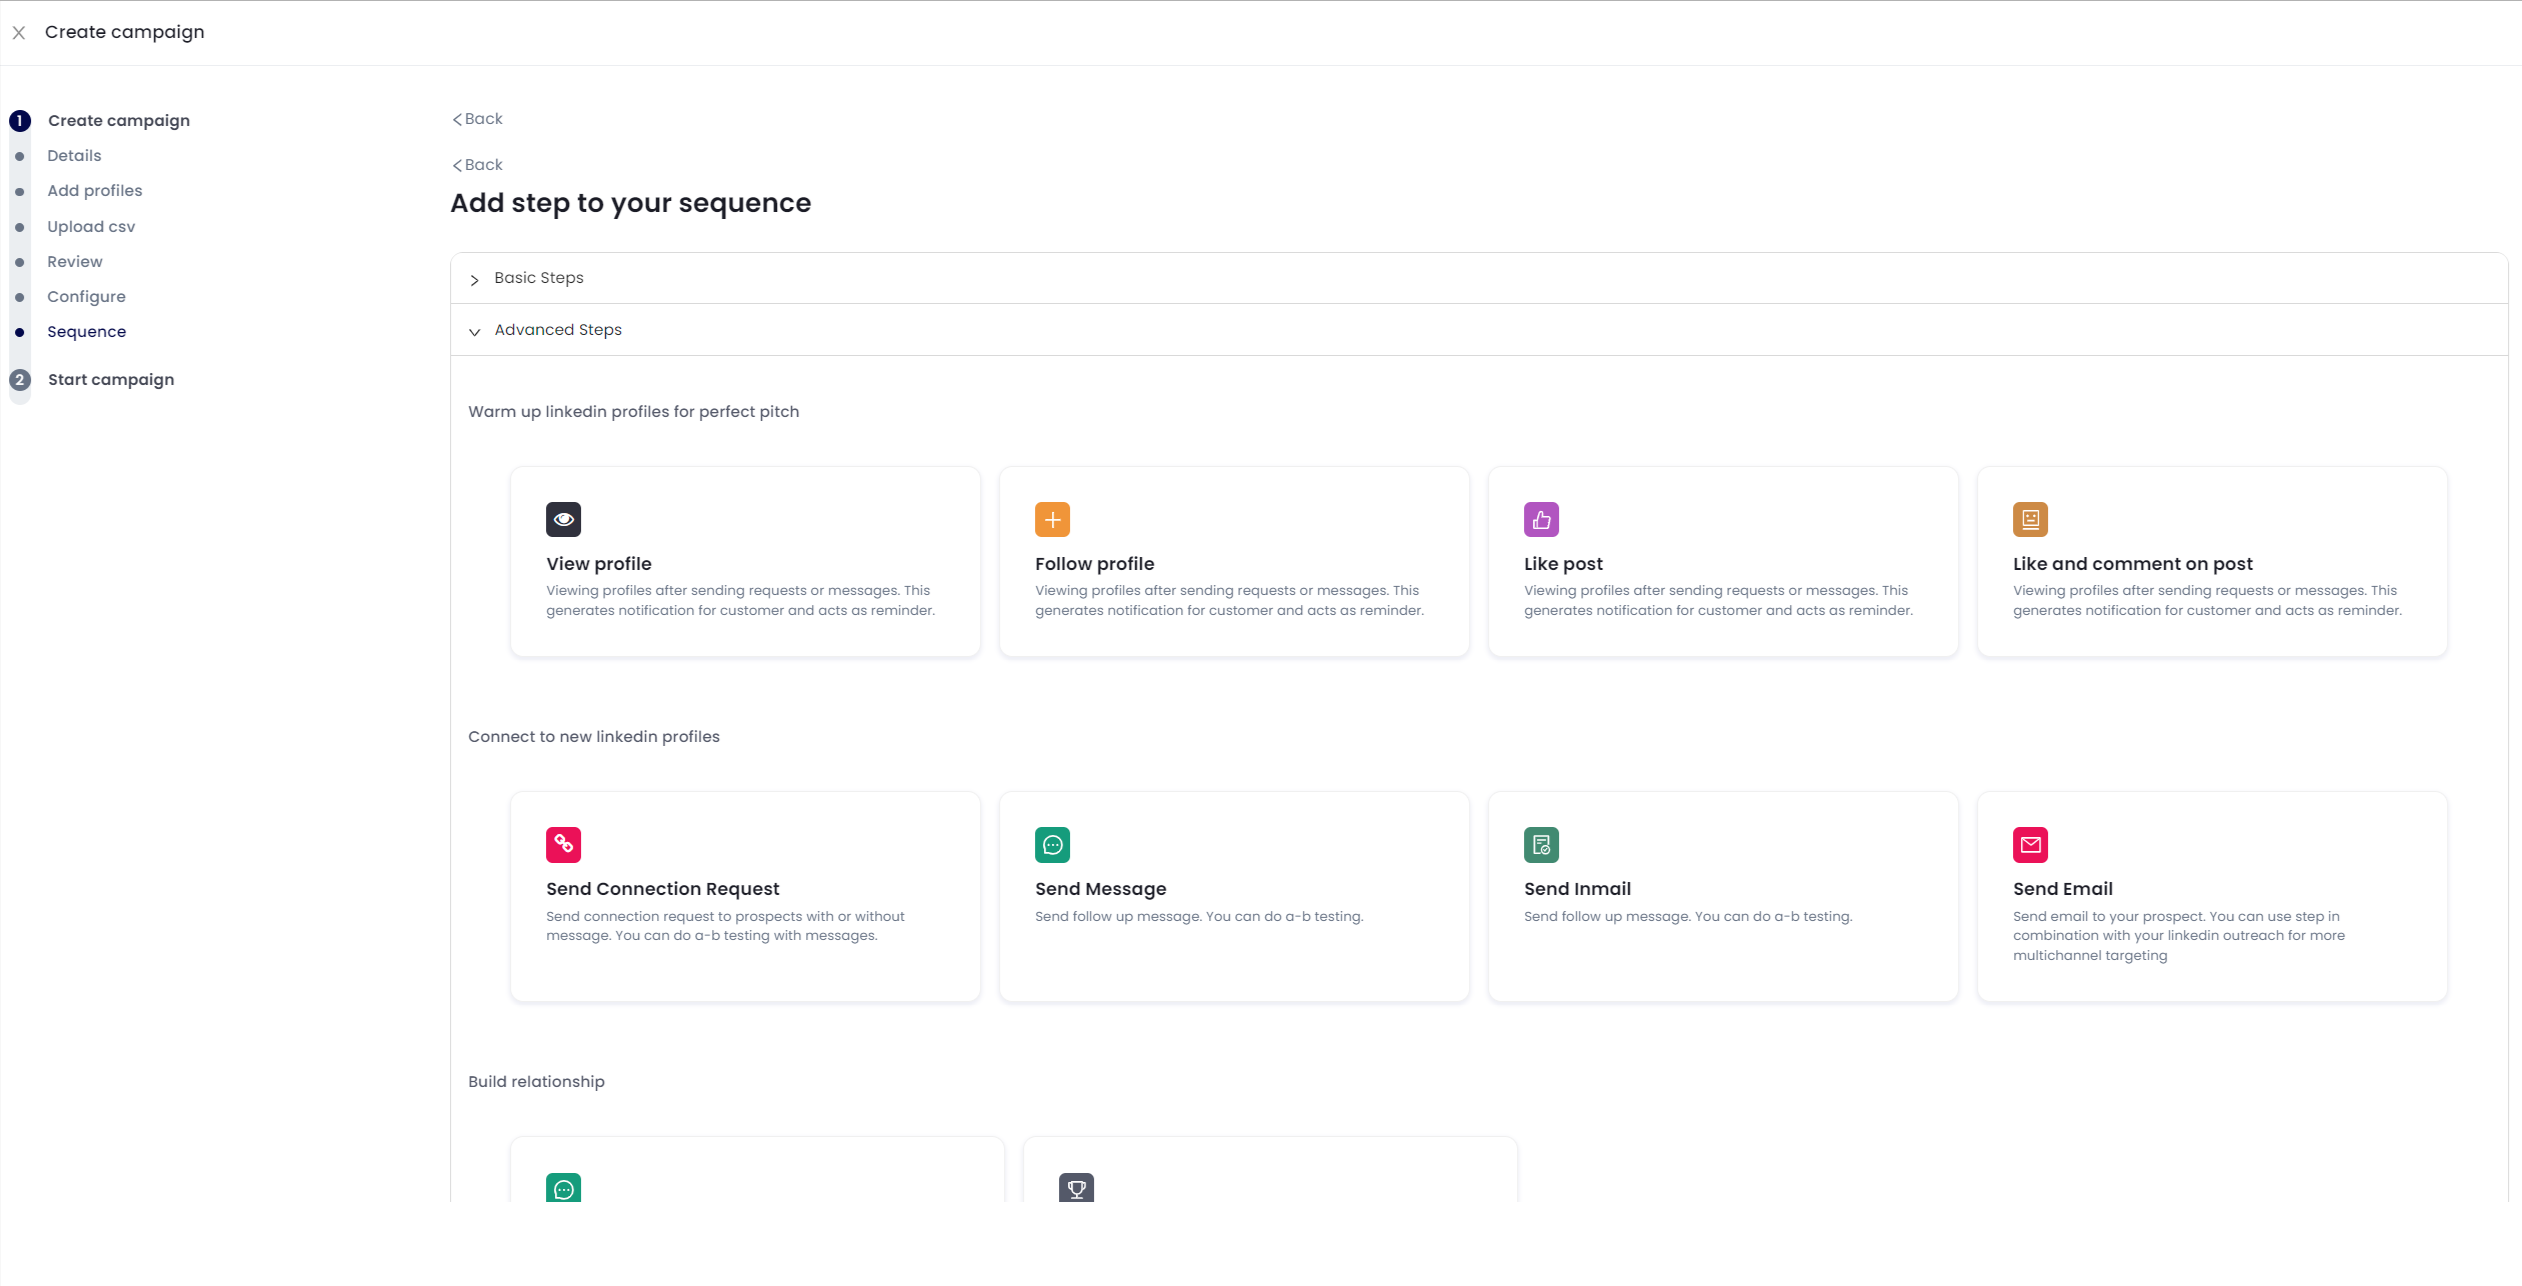
Note that beyond BASIC STEPS, you can also enter ADVANCED Steps that enable engagement of the prospect including Viewing their Profile, Liking Post etc.
15. When you are finished, click SAVE.
If you forget to do this and move off to another screen you will lose your sequence Content! Very Important.
16. Click Start Campaign.